5 Minute Photo Scope
Bokeh (pronounced boh-kay or incorrectly bok-uh) comes from the Japanese word boke (暈けor ボケ), which means blur or haze, or blur quality.
The English spelling bokeh was popularised in 1997 in Photo Techniques magazine, when Mike Johnston, the editor at the time, commissioned three papers on the topic for the May/June 1997 issue; he altered the spelling to suggest the correct pronunciation to English speakers, saying “it is properly pronounced with bo as in bone and ke as in Kenneth, with equal stress on either syllable”. But the spellings bokeh and boke have both been in use since at least 1996.
Essentially Bokeh is created by using a wide aperture to render a busy background into a soft expanse of colour, turning small points of light into soft circles, this establishes a shallow depth of field which causes the background to blur.
But not all Bokeh is pleasing: Good Bokeh means a background without any hard edges or sharpness. Nothing in the background should distract the audience or viewer. The blurry area should have circles of light that are round and smooth as circles with harder edges tend to be less visually appealing, since they distract more from the subject.
Bokeh can even be awkwardly shaped — the number of aperture blades the lens has determines the shape of the bokeh, if there’s only a few, that circle will actually look more like a hexagon.
Most newer lenses create a circular bokeh with a higher number of aperture blades — but even with new lenses, all bokeh is not created equal. Prime lenses tend to have better bokeh than zoom lenses because they typically have wider apertures. Even within prime lenses though, some options are better than others.
Capturing bokeh is simple — and fun, but first, pay attention to your background as you shoot. Look for small light sources. Shooting directly into an unobstructed sun will not create bokeh, but the sun filtering through or even reflecting off the leaves of trees will create bokeh. Water droplets also tend to grab some of that light to create bokeh when out of focus.
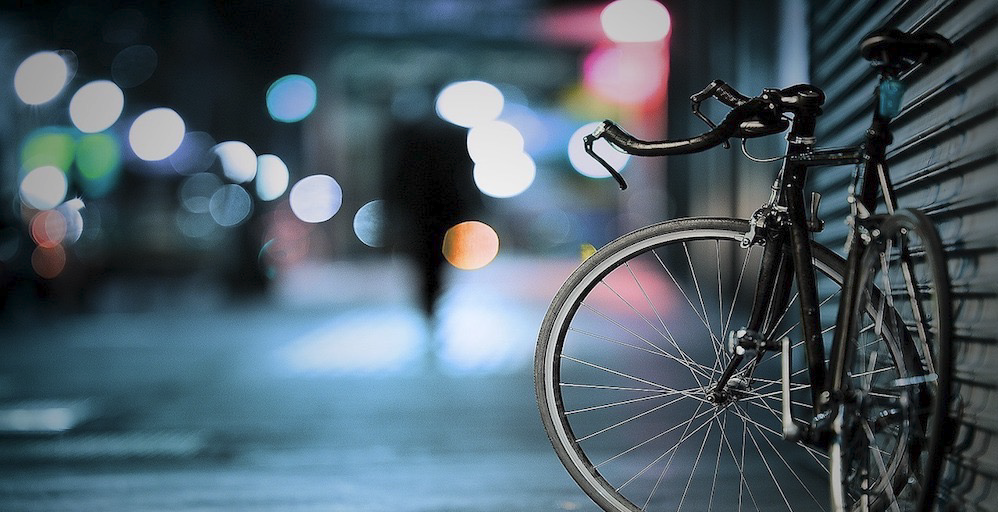
Man-made light sources can also be perfect bokeh material. A city skyline in the distance, traffic and street lights will all work as well. Bokeh can even be added to studio set ups using string lights or even by lighting up a crumpled piece of tinfoil. Anything that makes a small pin point of light, with the right lens, will work to make bokeh.
Once you’ve found your small light sources for bokeh, turn your camera to aperture priority mode (or full manual mode if you prefer). To get the most bokeh from the shot, use the widest aperture you have available. Then, just put your focal point on your subject, focus, and shoot.
If you take a look and the background bokeh just isn’t there, what then? First, if you’re not already on the widest aperture setting, go as wide as you can (or use a different lens with a wider aperture). In bright sunshine, you may need a neutral density filter in order to shoot that wide and still get a proper exposure. Neutral density filters will block out some of that bright light so you can use a wide aperture and still get a proper exposure. Or, if you don’t have a filter, you could try waiting until towards the end of the day, when the light isn’t so bright.
If aperture isn’t the issue, you can also move closer to the subject or move the subject farther from the background. Sometimes, finding brighter pinpoints of light helps too. For example, it’s easier to get bokeh with Christmas lights than it is to get it from light reflecting off tree leaves.